[스프링 인 액션] 4장 Spring Security : 스프링 시큐리티
- 📕 Book/스프링 인 액션
- 2021. 7. 11.
4장 스프링 시큐리티
💻 실습 : https://github.com/cusbert/spring-in-action-5th
책과는 달리 일부 코드 수정.
권한 관련 테이블을 sql로 생성하지 않고 spring.jpa.hibernate.ddl-auto 로 생성하도록 변경.
🎯 이 장에서 배우는 내용
- 스프링 시큐리티(Spring Security) 자동-구성하기
- 커스텀 사용자 스토리지 정의하기
- 커스텀 로그인 페이지 만들기
- CSRF 공격으로부터 방어하기
- 사용자 파악하기
4.1 스프링 시큐리티 활성화 하기
스프링 부트 보안 스타터 의존성 추가
    <dependency>
        <groupId>org.springframework.boot</groupId>
        <artifactId>spring-boot-starter-security</artifactId>
    </dependency>
    <dependency>
        <groupId>org.springframework.security</groupId>
        <artifactId>spring-security-test</artifactId>
        <scope>test</scope>
    </dependency>
security starter 만 추가해도 다음의 보안 구성이 추가된다
- 모든 HTTP 요청 경로는 인증(authentication) 되어야 한다.
- 어떤 특정 역할이나 권한이 없다
- 로그인 페이지가 따로 없다
- 스프링 시큐리티의 HTTP 기본 인증을 사용해서 인증된다
- 사용자는 하나만 있으며 이름은 user 이다. 비밀번호는 암호화 해준다
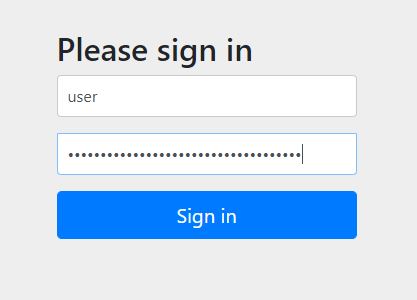
아래와 같은 로그를 확인 할 수 있다. 아래 password 로 로그인 가능하다
Using default security password: 087cfc6a-027d-44bc-95d7-cbb3a798a1ea4.2 스프링 시큐리티 구성하기
Spring Security 기본 구성
@Configuration
@EnableWebSecurity
public class SecurityConfig extends WebSecurityConfigurerAdapter {

    @Autowired
    DataSource dataSource;

    @Autowired
    private UserDetailsService userDetailsService;

    @Bean
    public PasswordEncoder passwordEncoder() {
        return new BCryptPasswordEncoder();
    }

    @Override
    protected void configure(HttpSecurity http) throws Exception {
        http.authorizeRequests()
                .antMatchers("/designs", "/orders")
                .access("hasRole('ROLE_USER')")
                .antMatchers("/", "/**")
                .access("permitAll")
                .and()
                    .formLogin()
                    .loginPage("/login")
                    .defaultSuccessUrl("/designs", true)
                    .failureUrl("/login?error=true")
                .and()
                    .logout()
                    .logoutSuccessUrl("/")
                .and()
                    .csrf();
    }

    @Override
    protected void configure(AuthenticationManagerBuilder auth) throws Exception {
        auth.userDetailsService(userDetailsService)
                .passwordEncoder(passwordEncoder());
    }
}- WebSecurityConfigurerAdapter의 서브 클래스
- configure(AuthenticationManagerBuilder auth) : 사용자 인증 정보를 구성하는 메소드
- configure(HttpSecurity http) : HTTP 보안을 구성하는 클래스
사용자 정보를 유지/관리하는 사용자 스토어 구성 방법
- In-memory 사용자 스토어
- JDBC 기반 사용자 스토어
- LDAP 사용자 스토어
- 커스텀 사용자 명세 서비스
4.2.1 인 메모리 사용자 스토어
- 메모리에 사용자 정보를 정의한다.
- 스프링 5부터는 반드시 비밀번호를 암호화 해야한다. 만약 암호화 하지 않으면 접근 거부 (HTTP 403) 또는 Internal Server Error(HTTP 500) 가 발생된다.
- 인메모리 사용자 스토어는 테스트 목적이나 간단한 애플리케이션에는 편리하다.
- 사용자 정보의 추가나 변경이 쉽지 않다.
- In-memory 사용자스토어에 사용자 정의하기
@Override
protected void configure(AuthenticationManagerBuilder auth) throws Exception {
        // In memory 기반의 사용자 스토어
    auth.inMemoryAuthentication()
            .withUser("user1") // 사용자 구성 시작 username 전달
            .password("{noop}password1") // 비밀번호 부여
            .authorities("ROLE_USER") // 권한 부여
            .and()
            .withUser("user2")
            .password("{noop}password2")
            .authorities("ROLE_USER");
}
4.2.2 JDBC 기반의 사용자 스토어
사용자 정보는 관계형 데이터베이스로 유지, 관리 되는 경우가 많으므로 JDBC 기반의 사용자 스토어가 적합해 보인다
- JDBC 기반의 사용자 스토어로 인증하기
@Autowired
DataSource dataSource;

@Override
protected void configure(AuthenticationManagerBuilder auth) throws Exception {
    // JDBC 기반의 사용자 스토어
    auth.jdbcAuthentication()
            .dataSource(dataSource)
            .usersByUsernameQuery(
                    "select username, password, enabled from users " +
                            "where username=?")
            .authoritiesByUsernameQuery(
                    "select username, authority from authorities " +
                            "where username=?")
            .passwordEncoder(new NoEncodingPasswordEncoder());
            // .passwordEncoder(new BCryptPasswordEncoder());
}
스프링에서는 사용자 정보를 저장하는 테이블과 열이 정해져 있고 쿼리가 미리 생성 되어 있다.
- users : 사용자 정보
- authorities : 권한 정보
- group_members : 그룹의 사용자
- group_authorities: 그룹의 권한
스프링 시큐리티의 기본 데이터베이스 테이블과 달라도 된다. 그러나 테이블이 갖는 열의 데이터 타입과 길이는 일치 해야한다.
스프링 시큐리티의 기본 SQL 을 우리 것으로 대체 할 때는 다음 사항을 지켜야한다.
- 매개변수(where 절에 사용됨)은 하나이며 username 이어야 한다.
- 사용자 인증 정보 쿼리에서는 username, password, enabled 열의 값을 반환해야 한다.
- 사용자 권한 쿼리에서는 해당 사용자의 이름(username) 과 부여된 권한(authority) 을포함하는 0 또는 다수의 행을 반환 할 수 있다.
- 그룹 권한 쿼리에서는 각각 그룹 id, 그룹 이름 group_name, 권한 authority 열을 갖는 0 또는 다수의 행을 반환 할 수 있다
암호화된 비밀번호 사용하기
비밀번호를 암호화 할 때는 passwordEncoder() 메소드를 호출하여 encoder 를 지정한다.
암호화 알고리즘을 구현한 스프링 시큐리티의 모듈에는 다음과 같은 구현 클래스가 포함되어 있다.
- BCryptPasswordEncoder : bcrypt를 해싱 암호화 한다.
- NoOpPasswordEncoder : 암호화 하지 않는다.
- Pbkdf2PasswordEncoder : PBKDF2를 암호화한다.
- SCryptPasswordEncoder : scrypt를 해싱 암호화 한다.
- StandardPasswordEncoder : SHA-256를 해싱 암호화 한다.
우리가 구현한 클래스를 사용할 수도 있다.
public class NoEncodingPasswordEncoder implements PasswordEncoder {
    @Override
    public String encode(CharSequence rawPwd) {
        return rawPwd.toString();
    }

    @Override
    public boolean matches(CharSequence rawPwd, String encodedPwd) {
        return rawPwd.toString().equals(encodedPwd);
    }
}
4.2.3 LDAP 기반 사용자 스토어
LDAP 기반 인증으로 스프링 시큐리티를 구성하기 위해서 ldapAuthentication() 메소드를 사용할 수 있다.
userSearchFilter()와groupSearchFilter메서드는 LDAP 기본 쿼리의 필터를 제공하기 위해 사용된다.userSearchBase()는 사용자를 찾기 위한 기준점 쿼리를 제공한다.groupSearchBase()는 그룹을 찾기 위한 기준점 쿼리를 지정한다.
@Override
protected void configure(AuthenticationManagerBuilder auth) throws Exception {
    //LDAP 기반 사용자 스토어
    auth.ldapAuthentication()
            .userSearchBase("ou=people")
            .userSearchFilter("(uid={0})")
            .groupSearchBase("ou=groups")
            .groupSearchFilter("(member={0})")
            .contextSource()
            .root("dc=tacocloud,dc=com")
            .ldif("classpath:users.ldif")
            .and()
            .passwordCompare() // 비밀번호 비교
            .passwordEncoder(new BCryptPasswordEncoder())
            .passwordAttribute("userPasscode");
}
비밀번호 비교 구성하기
LDAP 의 기본인증 전략은 사용자가 직접 LDAP 서버에서 인증받도록 하는 것이다.
그러나 비밀번호를 비교하는 방법도 있다.
- 비밀번호 비교 방법으로 LDAP 서버를 인증하고자 할때는
passwordCompare()를 호출하면 된다.
이 방법에서는 입력된 비밀번호를 LDAP 디렉터리에 전송한 후, 이 비밀번호를 사용자의 비밀번호 속성 값과 비교하도록 LDAP 서버에 요청한다. 이 때 비밀번호 비교는 LDAP 서버에서 수행되므로 실제 비밀번호는 노출 되지 않는다. - 로그인 폼에 입력된 비밀번호가 LDAP 서버에 있는 userPasscode 속성값과 비교된다. 만약 비밀번호가 다른 속성에 있다면
passwordAttribute()를 사용한다. passwordEncoder()메서드를 호출하여 암호화에 사용할 인코드를 지정할 수 있다.
원격 LDAP 서버 참조하기
contextSource() 메소드를 사용해서 해당 서버위치를 구성할 수 있다.
.contextSource()
.url("ldap://tacocloud.com:389/dc=tacocloud,dc=com");
내장된 LDAP 서버 서버 구성하기
스프링 시큐리티에서 제공하는 내장 LDAP 서버를 사용할 수 있다.
    <!-- LDAP -->
    <dependency>
        <groupId>org.springframework.boot</groupId>
        <artifactId>spring-boot-starter-data-ldap</artifactId>
    </dependency>
    <dependency>
        <groupId>org.springframework.ldap</groupId>
        <artifactId>spring-ldap-core</artifactId>
    </dependency>
    <dependency>
        <groupId>org.springframework.security</groupId>
        <artifactId>spring-security-ldap</artifactId>
    </dependency>
4.2.4 사용자 인증의 커스터마이징
사용자 도메인 객체와 퍼시턴스 정의하기
사용자 이름과 비밀번호 외에 전체 이름, 주소, 전화번호도 제공해야 한다.
@Entity
@Data
@NoArgsConstructor(access = AccessLevel.PRIVATE, force = true)
@RequiredArgsConstructor
@Table(name = "users")
public class User implements UserDetails {
    // Spring Security 의 UserDetails 구현

    @Id
    @GeneratedValue(strategy = GenerationType.AUTO)
    private Long id;
    @Column(name = "USERNAME", length = 100, nullable = false)
    private final String username;
    @Column(name = "PASSWORD", length = 255, nullable = false)
    private final String password;
    @Column(name = "FULLNAME", length = 100)
    private final String fullname;
    @Column(name = "STREET")
    private final String street;
    @Column(name = "CITY")
    private final String city;
    @Column(name = "STATE")
    private final String state;
    @Column(name = "ZIP")
    private final String zip;
    @Column(name = "PHONE_NUMBER")
    private final String phoneNumber;

    @OneToMany(mappedBy = "user")
    private List<Authority> authority;

    // 해당 사용자에게  부여된 권한을 저장한 컬렉션 반환
   @Override
    public Collection<? extends GrantedAuthority> getAuthorities() {
        return Arrays.asList(new SimpleGrantedAuthority("ROLE_USER"));
    }

    @Override
    public boolean isAccountNonExpired() {
        return true;
    }

    @Override
    public boolean isAccountNonLocked() {
        return true;
    }

    @Override
    public boolean isCredentialsNonExpired() {
        return true;
    }

    @Override
    public boolean isEnabled() {
        return true;
    }
}
User 클래스는 스프링 시큐리티의 UserDetails 인터페이스를 구현한다.
getAuthorities(): 사용자에게 부여된 권한을 저장한 컬렉션을 반환한다.isAccountNonExpired(),isCredentialsNonExpired()등은 사용자 계정 활성화 또는 비활성화 여부를 나타내는 boolean 값을 리턴한다.
사용자 명세 서비스 생성하기
스프링 시큐리티의 UserDetailsService 는 다음과 같이 간단한 인터페이스다.
이 인터페이스를 구현하는 클래스의 메서드에는 사용자 이름이 인자로 전달된다.
- 메서드 실행 후 UserDetails 객체가 반환되거나
- 이름이 없으면 UsernameNotFoundException를 발생시킨다.
public interface UserDetailsService {
    UserDetails loadUserByUsername(String username)
            throws UsernameNotFoundException;
}
@Service("userDetailsService")
public class UserRepositoryUserDetailsService implements UserDetailsService {
private UserRepository userRepository;
@Autowired
public UserRepositoryUserDetailsService(UserRepository userRepository) {
this.userRepository = userRepository;
}
@Override
public UserDetails loadUserByUsername(String username)
throws UsernameNotFoundException {
User user = userRepository.findByUsername(username);
if (user != null) {
return user;
}
throw new UsernameNotFoundException("'User '" + username + "' not found'");
}
}@Autowired
private UserDetailsService userDetailsService;
@Bean
public PasswordEncoder passwordEncoder() {
return new BCryptPasswordEncoder();
}
@Override
protected void configure(AuthenticationManagerBuilder auth) throws Exception {
// 사용자 인증 커스터마이징
auth.userDetailsService(userDetailsService)
.passwordEncoder(passwordEncoder());
}4.3 웹 요청 보안 처리하기
보안 규칙을 구성하려면 SecurityConfig 클래스에 configure(HttpSecurity http)를 오버라이딩 한다.
configure(HttpSecurity http) 메서드는 웹수준에서 보안을 처리하는 방법을 구성하는데 사용된다.
- HTTP 요청 처리를 허용하기 전에 충족되어야 할 특정 보안 조건을 구성한다.
- 커스텀 로그인 페이지를 구성한다
- 사용자가 애플리케이션의 로그아웃을 할 수 있도록한다
- CSRF 공격으로 부터 보호 하도록 구성한다.
// HTTP 보안을 구성하는 클래스
@Override
protected void configure(HttpSecurity http) throws Exception {
    http.authorizeRequests()
            .antMatchers("/designs", "/orders") // ROLE_USER 권한이 있는 유저만 허용
            .access("hasRole('ROLE_USER')")
            .antMatchers("/", "/**")
            .access("permitAll") // 이 외의 요청은 모두 허용
            .and() // 인증 구성이 끝나서 http 구성을 적용할 준비가 되었다
                .formLogin() // 커스텀 로그인 폼을 구성하기 위해 호출
                .loginPage("/login")
                //.loginProcessingUrl("/authenticate") // /authenticate 경로의 로그인 처리
                //.defaultSuccessUrl("/designs") // 로그인 페이지로 이동한 후 로그인 성공시 /design 페이지로 이동
                .defaultSuccessUrl("/designs", true) // 로그인 전에 어떤 페이지에 있었던 로그인 성공시 /design 페이지로 이동
                .failureUrl("/login?error=true")
                //.usernameParameter("user")
                //.passwordParameter("pwd")
            .and()
                .logout()
                .logoutSuccessUrl("/")
            .and()
                .csrf();
}
4.3.1 웹 요청 보안 처리
authorizeRequests() 는 ExpressInterceptUrlRegistry 객체를 반환한다. 이 객체를 사용하면 URL 경로와 패턴 및 해당경로의 보안 요구사항을 구성할 수 있다.
이런 규칙을 지정할 때는 순서가 중요하다. antMatchers() 는 먼저 지정된 보안 규칙을 우선적으로 처리한다.
@Override
protected void configure(HttpSecurity http) throws Exception {
    http.authorizeRequests()
            .antMatchers("/designs", "/orders") // ROLE_USER 권한이 있는 유저만 허용
            .access("hasRole('ROLE_USER')")
            .antMatchers("/", "/**")
            .access("permitAll") // 이 외의 요청은 모두 허용
}- "/designs", "/orders" 요청은 ROLE_USER 권한이 있는 사용자에게만 허용된다
- 이 외의 모든 요청은 모든 사용자에게 허용된다.
요청 경로가 보안 처리되는 방법을 정의하는 구성 메서드
| 메서드 | 하는일 |
|---|---|
| access(String) | 인자로 전달된 SpEL 표현식이 true 면 접근 허용 |
| anonymous() | 익명의 사용자에게 접근 허용 |
| authenticated() | 익명이 아닌 사용자로 인정된 경우 접근 허용 |
| denyAll() | 무조건 접근을 거부 |
| fullyAuthenticated() | 익명이 아니거나 또는 remember-me 가 아닌 사용자로 인증되면 접근 허용 |
| hasAnyAuthority(String…) | 지정된 권한 중 어떤 것이라도 사용자가 갖고 있으면 접근 허용 |
| hasAnyRole(String…) | 지정된 권한 중 어느 하나라도 사용자가 갖고 있으면 접근 허용 |
| hasAuthority(String) | 지정된 권한을 사용자가 갖고 있으면 접근 허용 |
| hasIpAddress(String) | 지정된 IP 주소로 부터 요청이 오면 접근 허용 |
| hasRole(String) | 지정된 역항을 사용자가 갖고 있으면 접근 허용 |
| not() | 다른 접근 메서드들의 효력 무효화 |
| permitAll() | 무조건 접근 허용 |
| rememberMe() | remember-Me(이전 로그인 정보를 쿠키나 디비에 저정한 후 일정 기간내 다시 접근 시 저장된 정보로 자동 로그인 됨)을 통해 사용자의 접근 허용 |
- 대부분의 메서드는 요청 처리의 기본적인 보안 규칙을 제공한다. 그러나 각 메서드에 정의된 보안 규칙만 사용된다는 제약이 있다.
- 따라서 이 대안으로
access()메서드를 사용하면 더 풍부한 보안규칙을 선언하기 위해 SpEL(Spring Expression Language)를 사용할 수 있다.
스프링 시큐리티에서 확장된 SpEL
| 보안표현식 | 산출결과 |
|---|---|
| authentication | The user’s authentication object |
| denyAll | Always evaluates to false |
| hasAnyRole(list of roles) | true if the user has any of the given roles |
| hasRole(role) | true if the user has the given role |
| hasIpAddress(IP address) | true if the request comes from the given IP address |
| isAnonymous() | true if the user is anonymous |
| isAuthenticated() | true if the user is authenticated |
| isFullyAuthenticated() | true if the user is fully authenticated (not authenticated with remember-me) |
| isRememberMe() | isRememberMe() true if the user was authenticated via remember-me |
| permitAll | permitAll Always evaluates to true |
| principal | principal The user’s principal object |
- SpEL 을 사용하면 어떤 보안 규칙도 작성할 수 있다.
4.3.2 커스텀 로그인 페이지 생성하기
기본 로그인 페이지를 교체하려면 우선 커스텀 로그인 페이지가 있는 경로를 스프링 시큐리티에 알려줘야한다.
커스텀 로그인 페이지 경로 지정하기
// HTTP 보안을 구성하는 클래스
@Override
protected void configure(HttpSecurity http) throws Exception {
    http.authorizeRequests()
            .antMatchers("/designs", "/orders")
            .access("hasRole('ROLE_USER')")
            .antMatchers("/", "/**")
            .access("permitAll")
            .and()
                .formLogin() // 커스텀 로그인 폼을 구성하기 위해 호출
                .loginPage("/login")
                //.loginProcessingUrl("/authenticate") // /authenticate 경로의 로그인 처리
                //.defaultSuccessUrl("/designs") // 로그인 페이지로 이동한 후 로그인 성공시 /design 페이지로 이동
                .defaultSuccessUrl("/designs", true) // 로그인 전에 어떤 페이지에 있었던 로그인 성공시 /design 페이지로 이동
                .failureUrl("/login?error=true")
                //.usernameParameter("user")
                //.passwordParameter("pwd")
            .and()
                .logout()
                .logoutSuccessUrl("/")
            .and()
                .csrf();
}formLogin(): 로그인loginPage("/login"): 로그인 페이지 지ㅓㅇloginProcessingUrl("/authenticate"): "/authenticate" 경로로 요청 로그인 처리하라usernameParameter("user"),passwordParameter("pwd"): 이 때 사용자 이름과 비밀번호의 필드 이름은 user, pwd 가 된다.defaultSuccessUrl("url"): 사용자가 직접 로그인 페이지로 이동했을 경우는 로그인한 후 루트 경로로 이동한다. 하지만 이를 지정해주면 로그인 성공 시 해당 url 로 이동한다.defaultSuccessUrl("url", true): // 로그인 전에 어떤 페이지에 있었던 로그인 성공시 해당 페이지로 이동failureUrl("/login?error=true"): 로그인 실패 시 이동할 페이지logout(): 로그아웃logoutSuccessUrl("/"): 로그아웃 성공 시 이동할 페이지
WebConfig 에 뷰 컨트롤러 선언하기
@Configuration
class WebConfig implements WebMvcConfigurer {

    @Override
    public void addViewControllers(ViewControllerRegistry registry) {
        registry.addViewController("/").setViewName("home");
        registry.addViewController("/login");
    }
}
4.3.4 CSRF 공격 방어하기
CSRF(Cross-Site Request Forgery, 크로스 사이트 요청 위조)는 많이 알려진 보안 공격이다.
즉 사용자가 웹사이트에 로그인한 상태에서 악의적인 코드(사이트 간의 요청을 위조하여 공격하는) 가 삽입된 페이지를 열면 공격 대상이 되는 웹사이트에 자동으로 폼이 제출되고 이 사이트는 위조된 공격 명령이 믿을 수 있는 사용자로부터 제출된 것으로 판단하게 되어 공격에 노출된다.
CSRF 공격을 막기 위해서 애플리케이션에서는 form의 hidden 필드에 넣을 CSRF 토큰을 생성할 수 있다. 그리고 해당 필드에 토큰을 넣은 후 서버에 전송된다. 그리고 서버에서는 이 토큰을 원래 생성되었던 토큰과 비교하여 토큰이 일치하면 해당 요청의 처리가 허용된다.
스프링 시큐리티에는 내장된 CSRF 방어 기능이 있다. _csrf 라는 이름의 필드를 애플리케이션이 제출하는 폼에 포함 시키면 된다.
만약 스프링 MVC의 JSP 태그 라이브러리, Thymeleaf를 스프링 시큐리티 dialect 와 함께 사용중이라면 hidden 필드조차 자동 생성 되어 따로 지정해 줄 필요가 없다.
실제 업무용 애플리케이션에서는 csrf 를 비활성화 하지 말자. 단 REST API 서버로 실행되는 애플리케이션의 경우 CSRF를 disable 해야한다.
@Override
protected void configure(HttpSecurity http) throws Exception {
    http.authorizeRequests()
            .antMatchers("/designs", "/orders")
            .access("hasRole('ROLE_USER')")
            .antMatchers("/", "/**")
            .access("permitAll")
            .and()
                .formLogin()
                .loginPage("/login")
                .defaultSuccessUrl("/designs", true)
            .and()
                .logout()
                .logoutSuccessUrl("/")
            .and()
                .csrf();
}
4.4 사용자 인지하기
사용자가 누구인지 결정하는 방법은 여러 가지가 있으며, 그 중 많이 사용되는 방법은 다음과 같다.
- Princial 객체를 컨트롤러에 주입한다.
- Authentication 객체를 컨트롤러에 주입한다.
- SecurityContextHolder를 사용해서 보안 컨텍스트를 얻는다.
@AuthenticationPrincipal어노테이션을 메서드에 지정한다.
@PostMapping
public String processOrder(@Valid Order order,
                            Errors errors,
                            SessionStatus sessionStatus,
                            @AuthenticationPrincipal User user) {
    if (errors.hasErrors()) {
        return "orderForm";
    }

    order.setUser(user);

    orderRepository.save(order);
    sessionStatus.setComplete();

    return "redirect:/";
}@AuthenticationPrincipal의 장점은 타입변화이 필요없고 Authentication과 동일하게 보안 특정 코드만 갖는다.@AuthenticationPrincipal를 통해 현재 로그인한 사용자 정보를 알 수 있다.
📌 요약
- 스프링 시큐리티의 자동-구성은 보안을 시작하는 데 좋은 방법이다. 그러나 대부분의 애플리케이션에서는 나름의 보안 요구사항을 충족하기 위해 별도의 보안 구성이 필요하다.
- 사용자 정보는 여러 종류의 스토어에 저장되고 관리 될 수 있다. 예를 들어 관계형 데이터 베이스, LDAP 이다.
- 스프링 시큐리티는 자동으로 CSRF 공격을 방어한다
- 인증된 사용자에 관한 정보는 SecurityContext 객체(
SecurityContextHolder.getContext()에서 반환됨)를 통해서 얻거나,@AuthenticationPrincipal을 사용해서 컨트롤러에 주입하면 된다.